

Build a masonry gallery in Divi with category filters, pagination and a lightbox. Six steps in the Divi Builder, each with a screenshot, and no custom code.
To create a masonry gallery in Divi, add the DG Masonry Gallery module to a row, choose your photos under Gallery Images, set the columns for desktop, tablet and phone, then turn on Filter Navigation and pick the hover and lightbox style. The module is part of the DiviGrid plugin and works in Divi 5 and Divi 4.
What is a masonry gallery?
A masonry gallery places photos in columns of equal width and lets each photo keep its own height. Tall and wide images sit together without cropping, like bricks in a wall. It suits portfolios, product photos and any set where the images have different shapes.
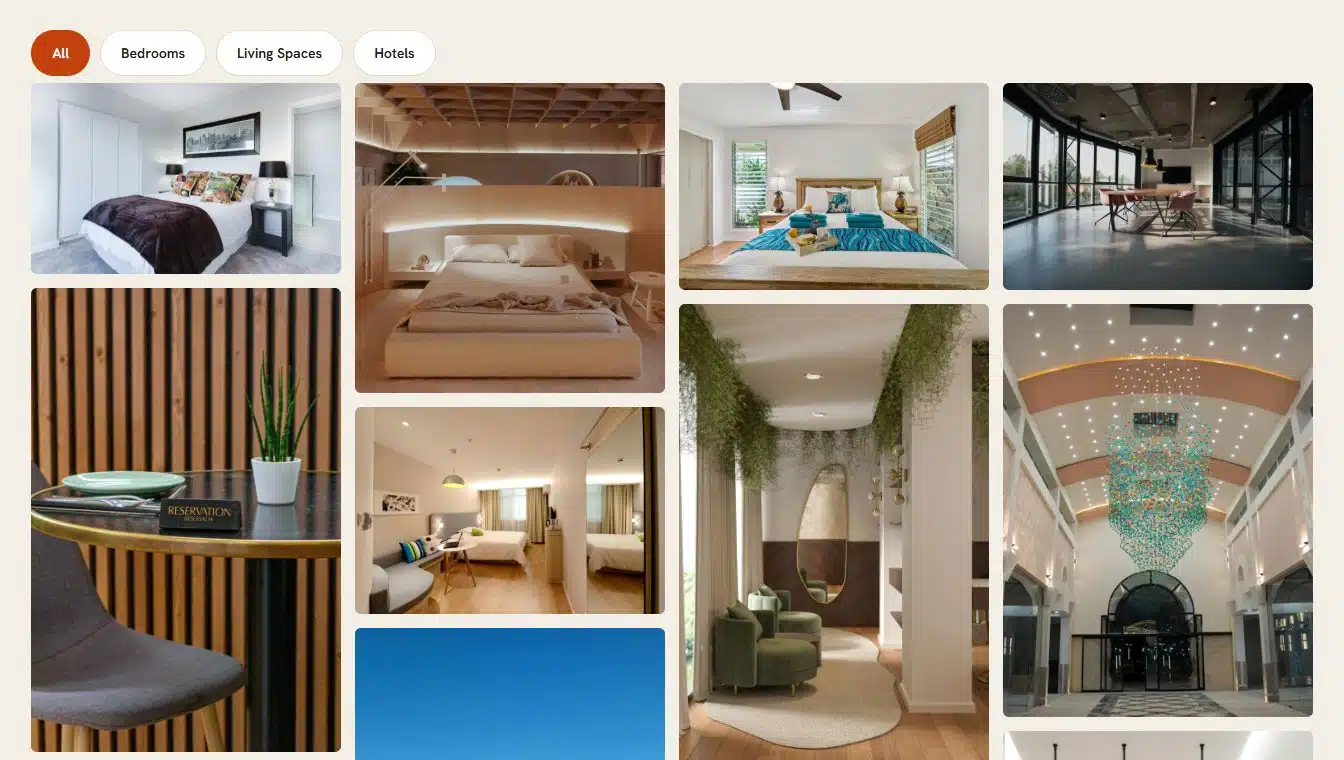
You can try this gallery on the Masonry Gallery demo page: click a filter, hover a photo and open the lightbox.
What you need
- The Divi theme or the Divi Builder plugin (Divi 5 or Divi 4). The screenshots below are from Divi 5.
- The DiviGrid plugin, which includes the DG Masonry Gallery module.
- Your photos, uploaded to the WordPress Media Library.
How to create a masonry gallery in Divi
Add the DG Masonry Gallery module
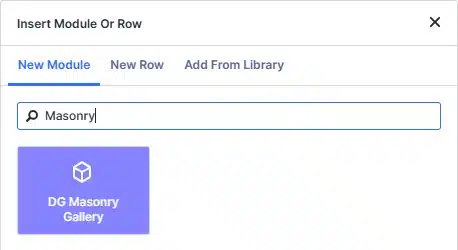
Open your page in the Divi Builder and add a row with one column. Click the grey plus icon inside the column, type Masonry in the search box and click DG Masonry Gallery.
Choose the photos
In the Content tab, open Gallery Images and click the plus tile. Pick photos from the Media Library or upload new ones. The thumbnails show the photos in the gallery.
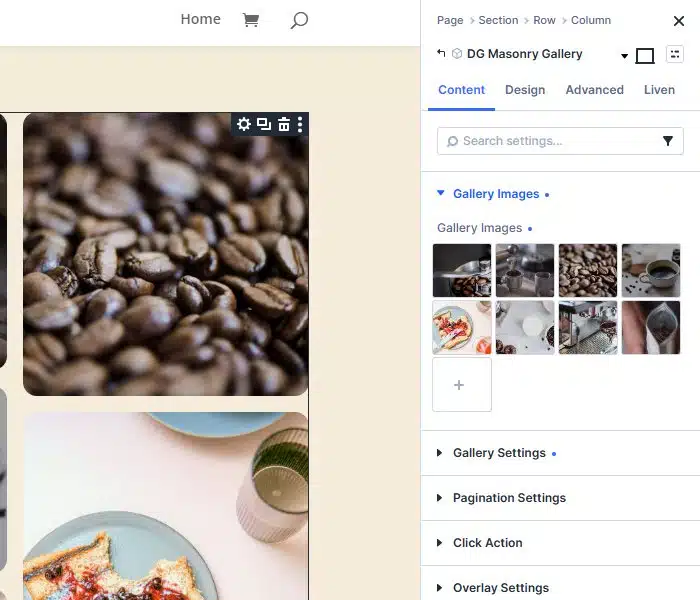
You do not need to crop the photos to one shape. Masonry keeps each photo's own height, which is the point of the layout.
Set the columns and spacing
Open Gallery Settings:
- Image To Display: how many photos sit side by side. You can choose 1 to 8 per row, and set a different number for tablet and phone.
- Item Space Between: the gap between photos, for example 16 px.
- Image Size: which WordPress image size to load. A smaller size loads faster.
- Random Image Load: shuffles the photos on every visit.
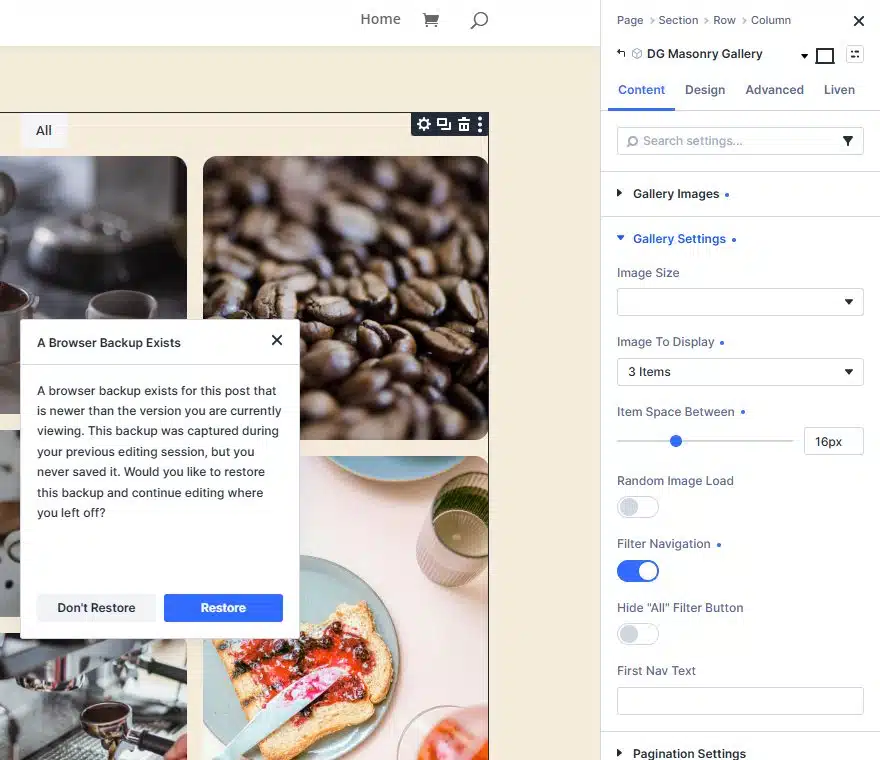
Three or four columns on desktop, two on tablet and one or two on phone works for most sites.
Add category filters (optional)
The filter buttons come from your Media Library, so each photo can belong to one or more categories:
- Go to Media › Library and open a photo.
- Type its category in the Divigrid - Category field, for example Beans. Separate several categories with commas.
- Repeat for each photo, then go back to the module.
- In Gallery Settings, turn on Filter Navigation.
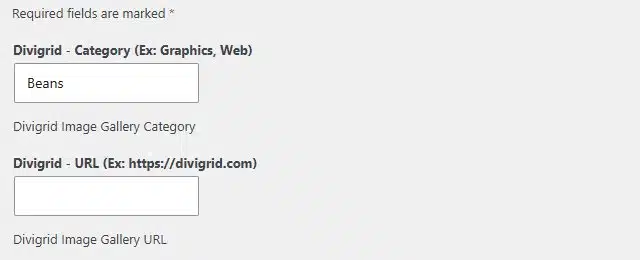
The module builds one button per category, plus an "All" button. Rename it with First Nav Text or hide it with Hide "All" Filter Button. The chosen filter is added to the page URL, so a shared link opens the gallery on that category.
Choose what happens on click
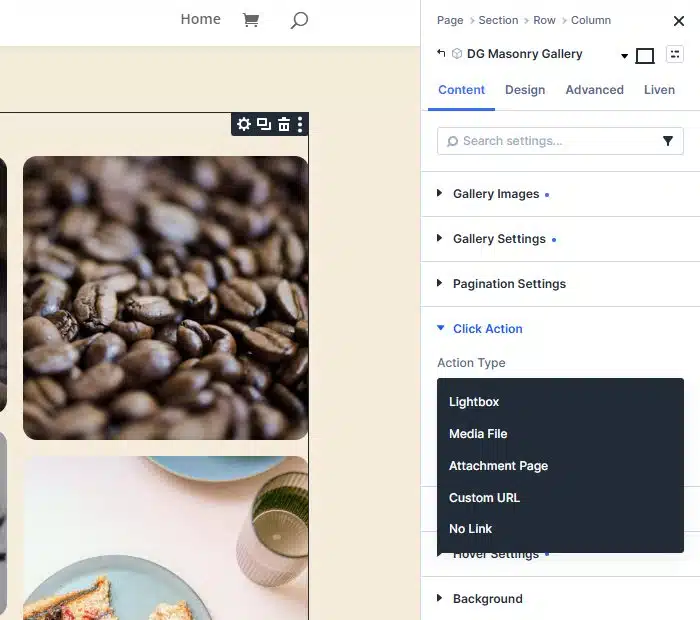
Open Click Action and pick an Action Type:
- Lightbox: opens the photo large on the same page. Turn on Lightbox Image Fit In Window so tall photos fit the screen.
- Media File or Attachment Page: opens the image file or its WordPress page.
- Custom URL: sends each photo to its own link, set in the Divigrid - URL field in the Media Library. Good for linking photos to products or case studies.
- No Link: the photos are for viewing only.
Style the hover, then save
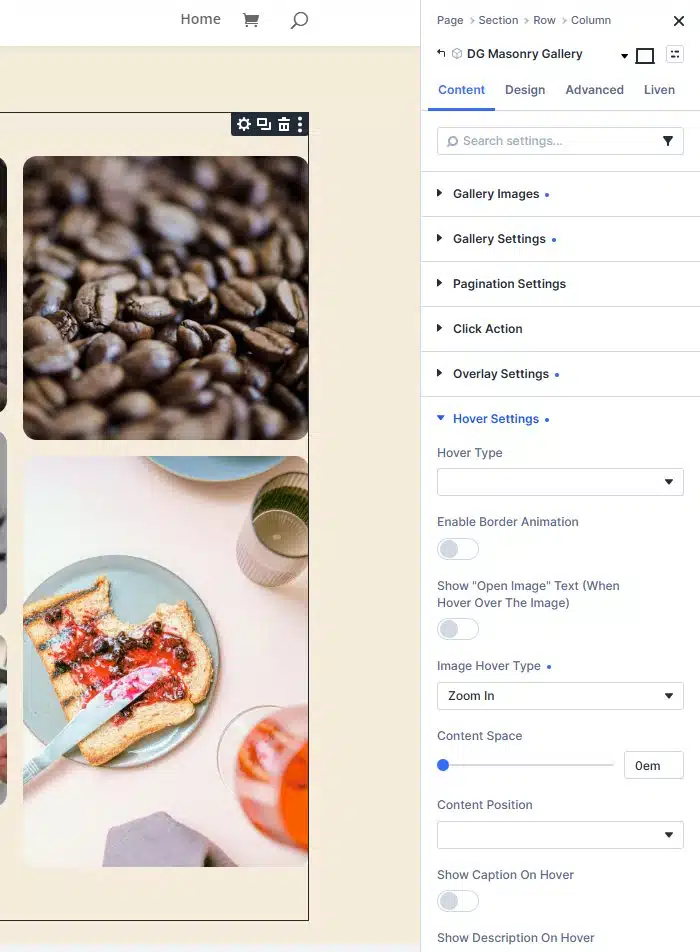
Open Hover Settings. Image Hover Type sets the motion when a visitor points at a photo, such as Zoom In. Show Caption On Hover and Show Description On Hover reveal the text you wrote in the Media Library, and Enable Border Animation draws an animated frame. Overlay Settings adds a colour gradient on top of the photo.
Click Save. Check the page on a phone too: the Divi Builder's phone preview shows how many columns are left at that size.
Settings worth knowing
| Setting | What it does |
|---|---|
| Pagination | Splits a large set into pages. You choose the items per page, the alignment and the pager colours. |
| Random Image Load | Shuffles the gallery on every page load, so returning visitors see a new order. |
| Click action | Five choices: lightbox, media file, attachment page, a custom URL per image, or no link. |
| Hover effects | Advanced hover with 9 image effects, a zoom level and 9 text positions, or a directional hover that follows the cursor. |
| Overlay and borders | A gradient overlay in your own colours and direction, plus 19 animated border styles. |
| Lightbox | Shows the title as a block, pill, transparent text or bar, with an optional top bar, 10 preloaders and fit-to-window images. |
Masonry or justified?
Masonry keeps every column the same width and lets photos differ in height. It is a good fit for portrait-heavy sets, products and Pinterest-style boards.
If your photos are mostly landscape and you want straight, even rows, a justified gallery fits better. See the Justified Gallery module.
Tips for a better gallery
- Resize photos before you upload. Large files slow the page. Our guide to Divi image optimization covers the basics.
- Keep categories short. Four to six filter buttons are easy to scan. Too many push the photos down the page.
- Use pagination for big sets. Show a page of photos first and let visitors ask for more.
- Write alt text. Describe each photo in the Media Library. It helps screen readers and image search.
- Check the phone view. One or two columns keep photos large enough to see.
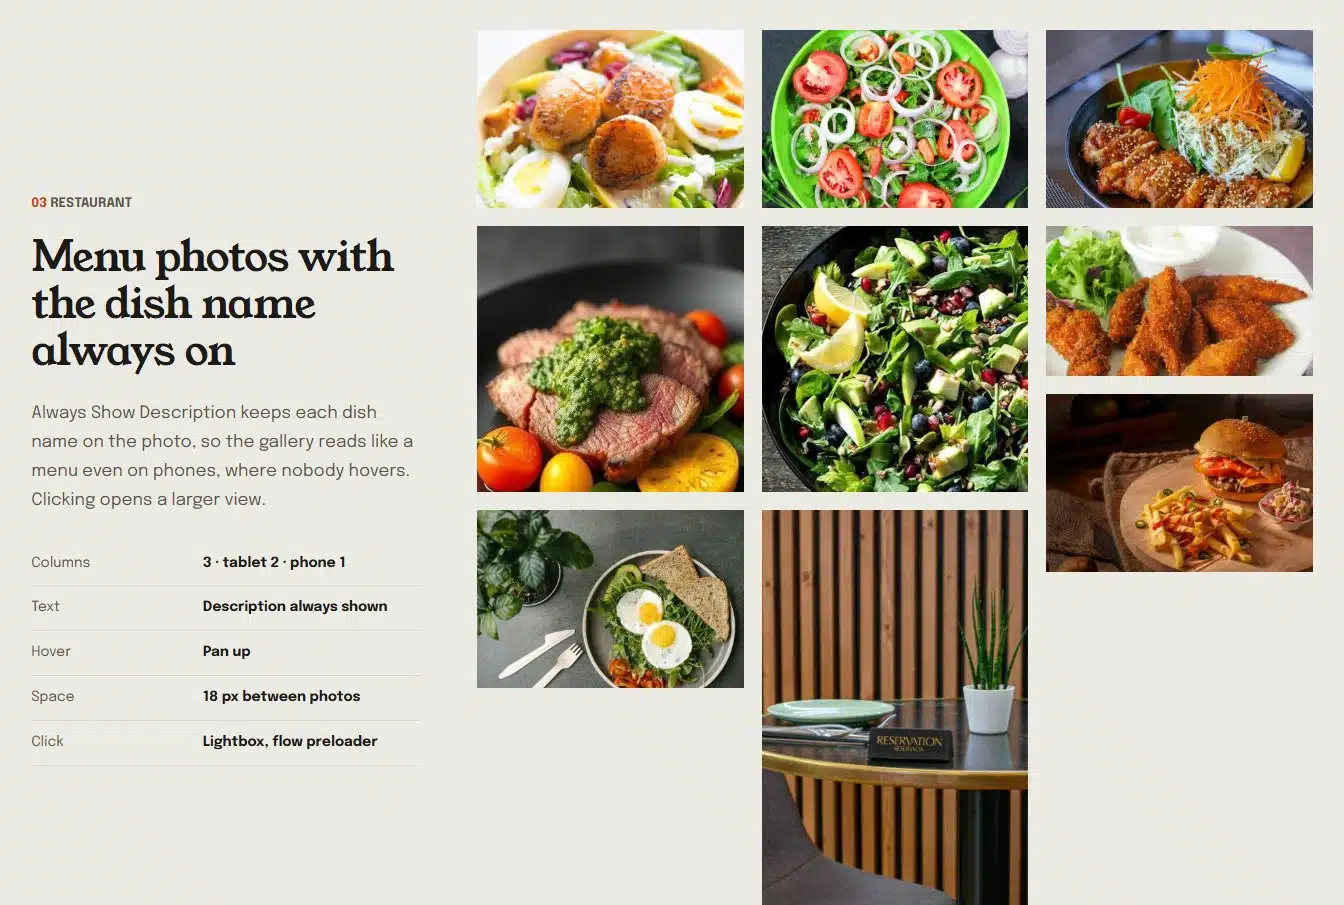
Filter the photos, hover them and open the lightbox on real examples for a shop, a class wall and a restaurant.
Frequently asked questions
How do I create a masonry gallery in Divi?
Add the DG Masonry Gallery module to a row, choose your photos under Gallery Images, set Image To Display for each device, then style the hover and lightbox and save.
How do I add filters to a Divi gallery?
In the Media Library, type categories in each image's Divigrid - Category field, separated by commas. Then turn on Filter Navigation in the module. It builds one button per category.
How many columns can a masonry gallery have?
You can show 1 to 8 images per row, set separately for desktop, tablet and phone.
Does the Masonry Gallery work in Divi 5 and Divi 4?
Yes. Every setting described here is available in both Divi 5 and Divi 4.
See the Masonry Gallery module, read the module documentation or compare the plans.










0 Comments