

Pin tooltips to a photo so visitors can hover or tap a spot and read more. Six steps in the Divi Builder, each with a screenshot.
To add hotspots to an image in Divi, add the DG Image Hotspot module and upload your photo, add one Hotspot Item per spot, set each spot's left and top position in percent, then write the tooltip text and choose the trigger, placement and animation. The module is part of the DiviGrid plugin and works in Divi 5 and Divi 4.
What is an image hotspot?
An image hotspot is a small marker on a photo. When a visitor hovers or taps it, a tooltip opens with a title, text, a picture or a whole Divi layout. Hotspots let one image explain many things: the products in a room, the stops on a map or the parts of a machine.
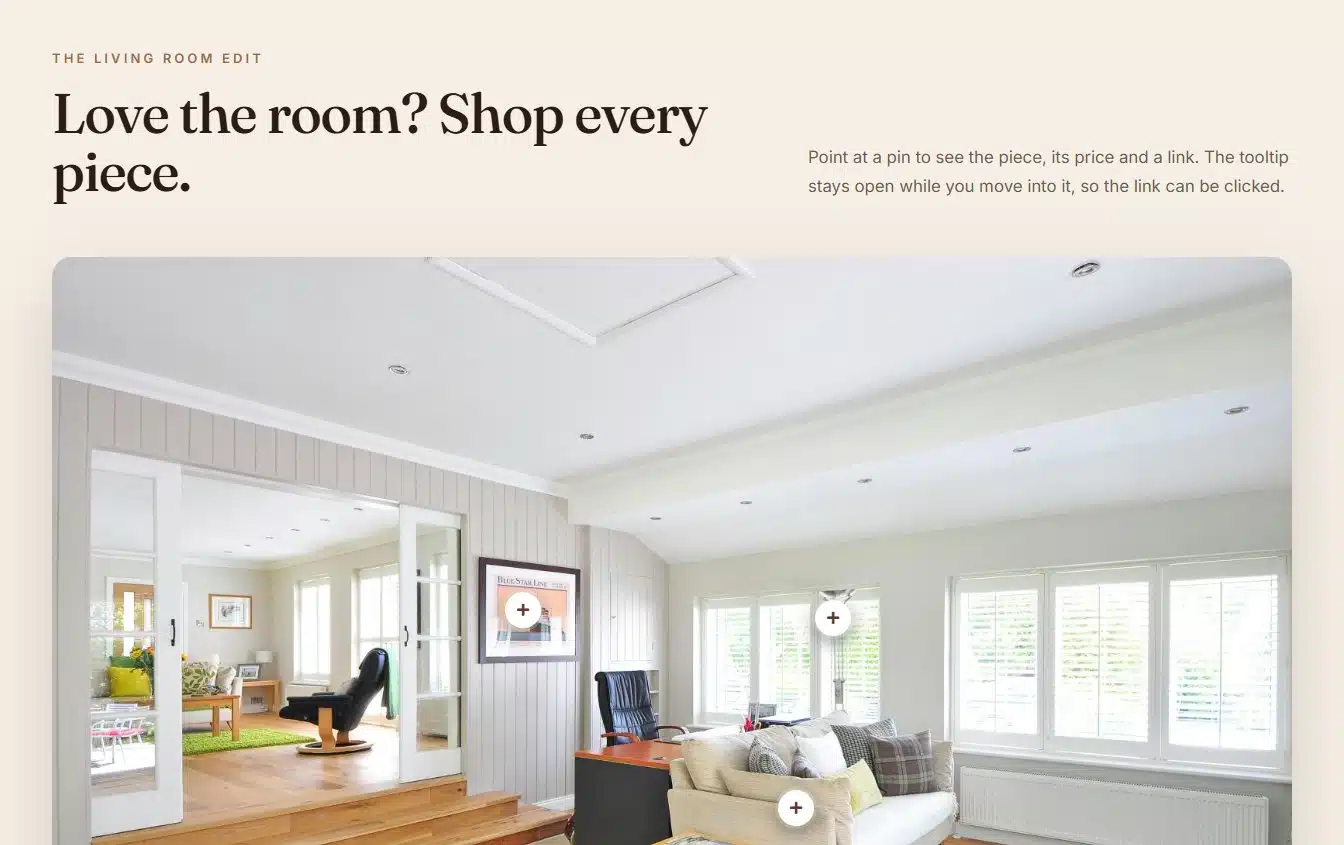
You can try this image and five others on the Image Hotspot demo page.
What you need
- The Divi theme or the Divi Builder plugin (Divi 5 or Divi 4). The screenshots below are from Divi 5.
- The DiviGrid plugin, which includes the DG Image Hotspot module.
- One clear photo, and a short note for each thing you want to point at.
How to add hotspots to an image in Divi
Add the DG Image Hotspot module
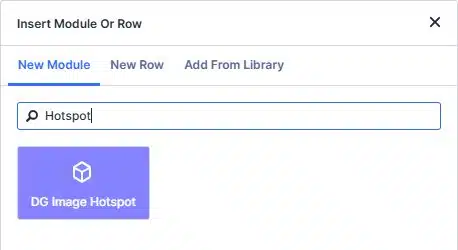
Open your page in the Divi Builder and add a row. Click the grey plus icon, type Hotspot and click DG Image Hotspot.
Upload the photo and add one item per spot
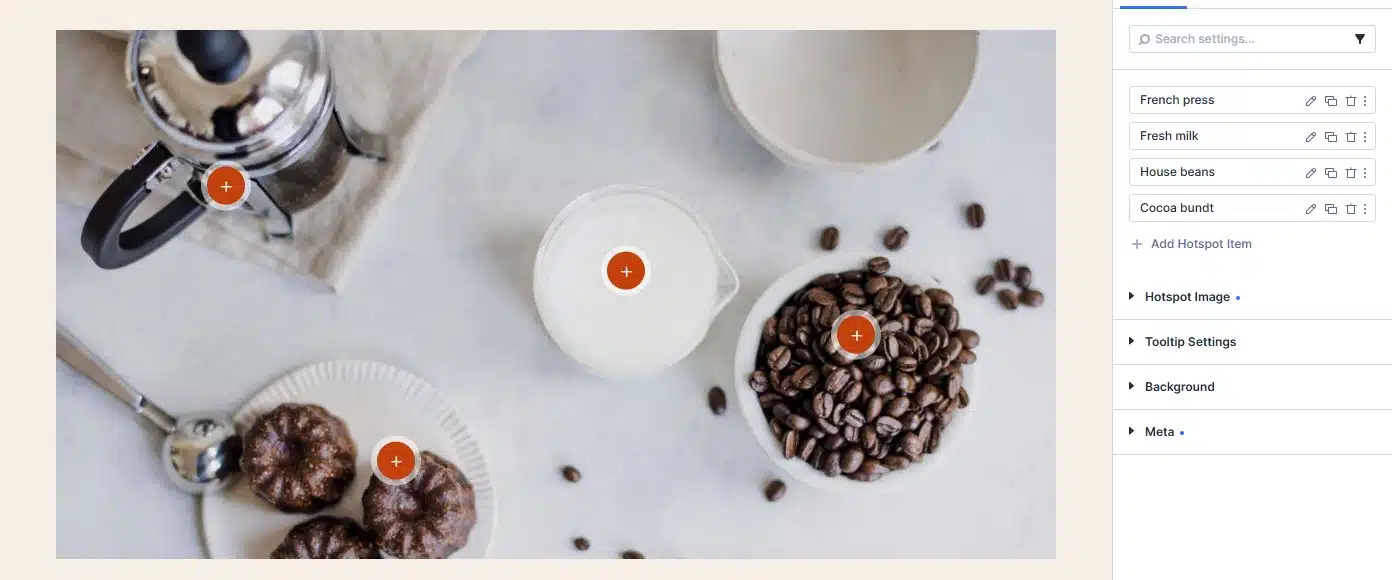
Open Hotspot Image and upload your photo. Fill in Hotspot Image Alt so screen readers know what it shows. Then click Add Hotspot Item once for every marker you want. Name each item after what it points to, so the list stays easy to read.
Choose what the marker looks like
Open an item with the pencil icon and expand Spot Content. Spot Type has three choices: Icon (any icon from the Divi icon set, such as a plus), Image (a small picture you upload) or Text (a short label such as a number).
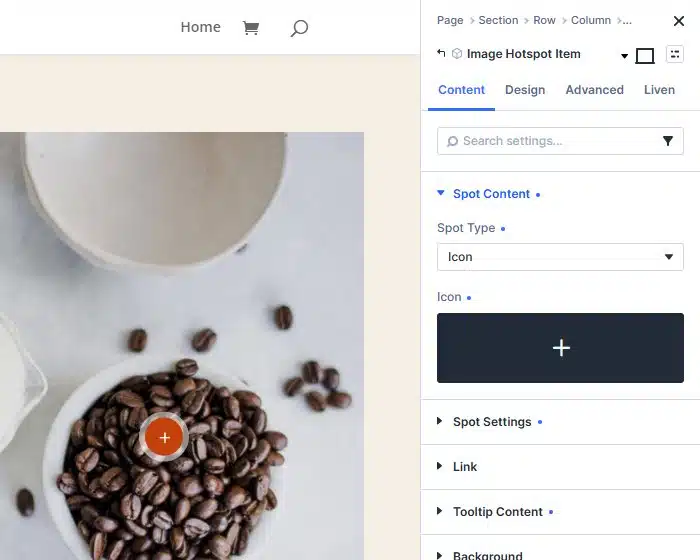
Nothing shows on the photo? A new item starts with Spot Type set to "Select". Pick Icon, Image or Text and the marker appears.
Place the spot
Open Spot Settings. Horizontal Position moves the marker from the left edge (0%) to the right edge (100%), and Vertical Position from the top (0%) to the bottom (100%). Drag the sliders and watch the marker move on the canvas. Spot Size sets how big it is, and Use Spot Animation adds a pulse that draws the eye.
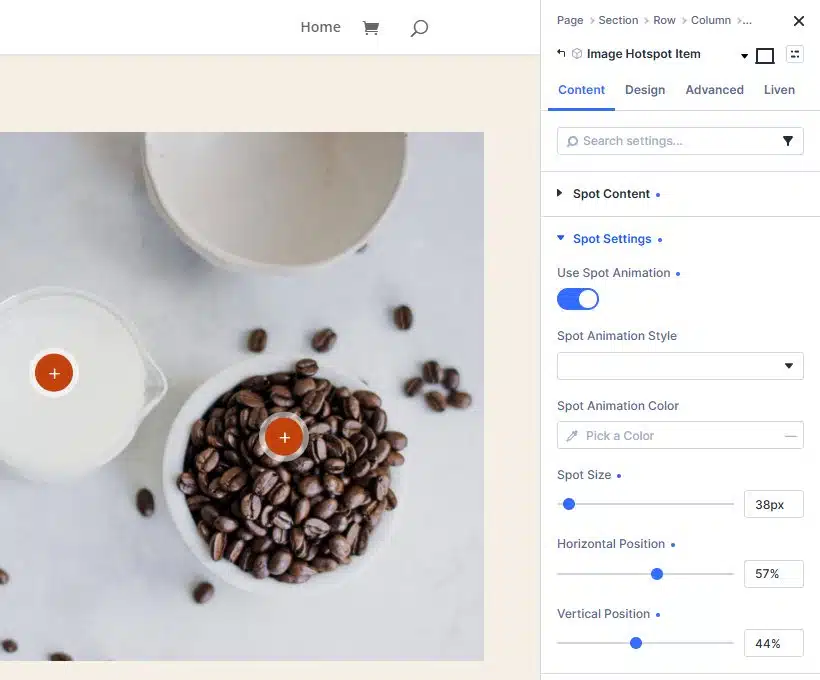
Because positions are in percent, the marker stays on the same object when the photo shrinks on a phone.
Write the tooltip
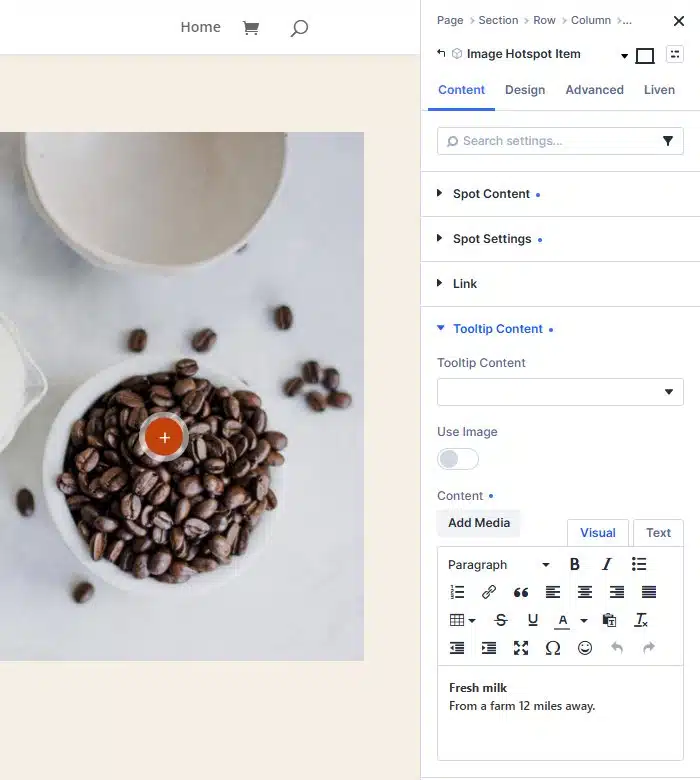
Open Tooltip Content. With Tooltip Content set to Custom Text, type the text in the editor. A bold product name with one short line under it reads well. Turn on Use Image to add a picture, or choose Layout to show a saved Divi Library layout with buttons or a form.
Set the tooltip behaviour and save
Go back to the main module and open Tooltip Settings to choose the trigger (hover, click or both), the placement and the animation. Style the tooltip box and the markers in the Design tab, then click Save. This is the result on the page:
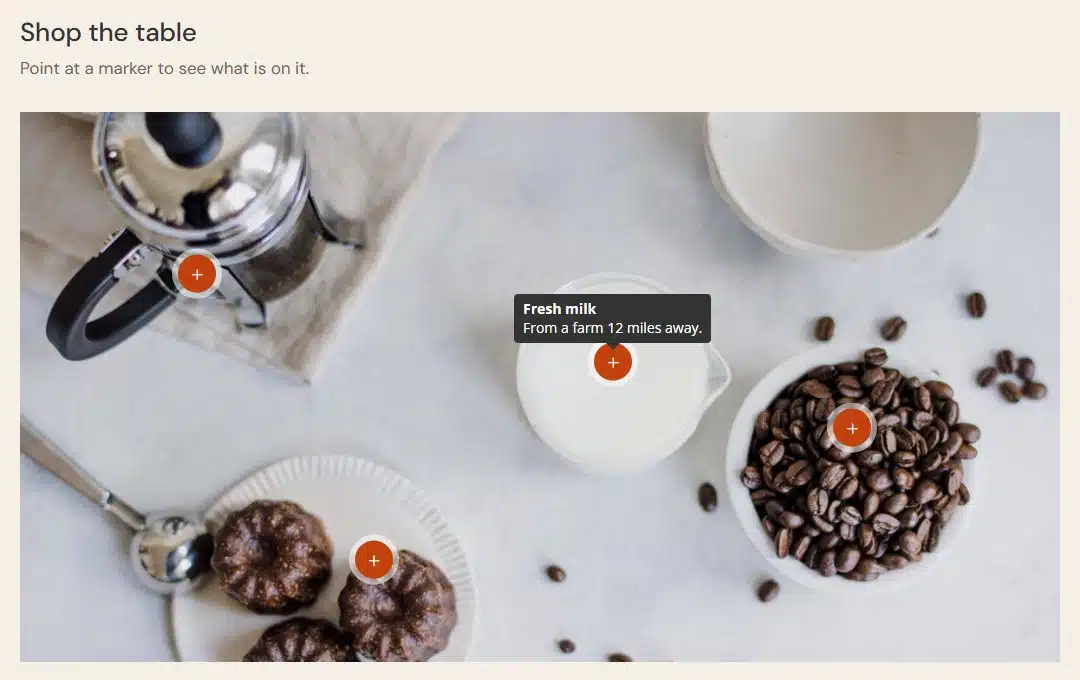
Round markers. To turn the marker background into a circle, add this to the module's Advanced, Custom CSS, Free-Form CSS field: selector .digr_spot_wrapper{border-radius:999px}
Tooltip settings worth knowing
| Setting | Options |
|---|---|
| Marker type | Icon, image or text. |
| Trigger | Hover, click or both. Click works well on touch screens and for tooltips with links. |
| Placement | 12 placements: above, below, left or right of the spot, at the start, centre or end. |
| Tooltip animation | 5 animations: Fade, Scale, Shift away, Shift toward and Perspective. |
| Interactive | Keeps the tooltip open while visitors move into it, so its links and buttons can be clicked. |
| Pulse animation | Four looping effects that show visitors where the spots are. |
Ideas for image hotspots
- Shop the room or shop the look. Tag each product in a lifestyle photo with its name, price and a link.
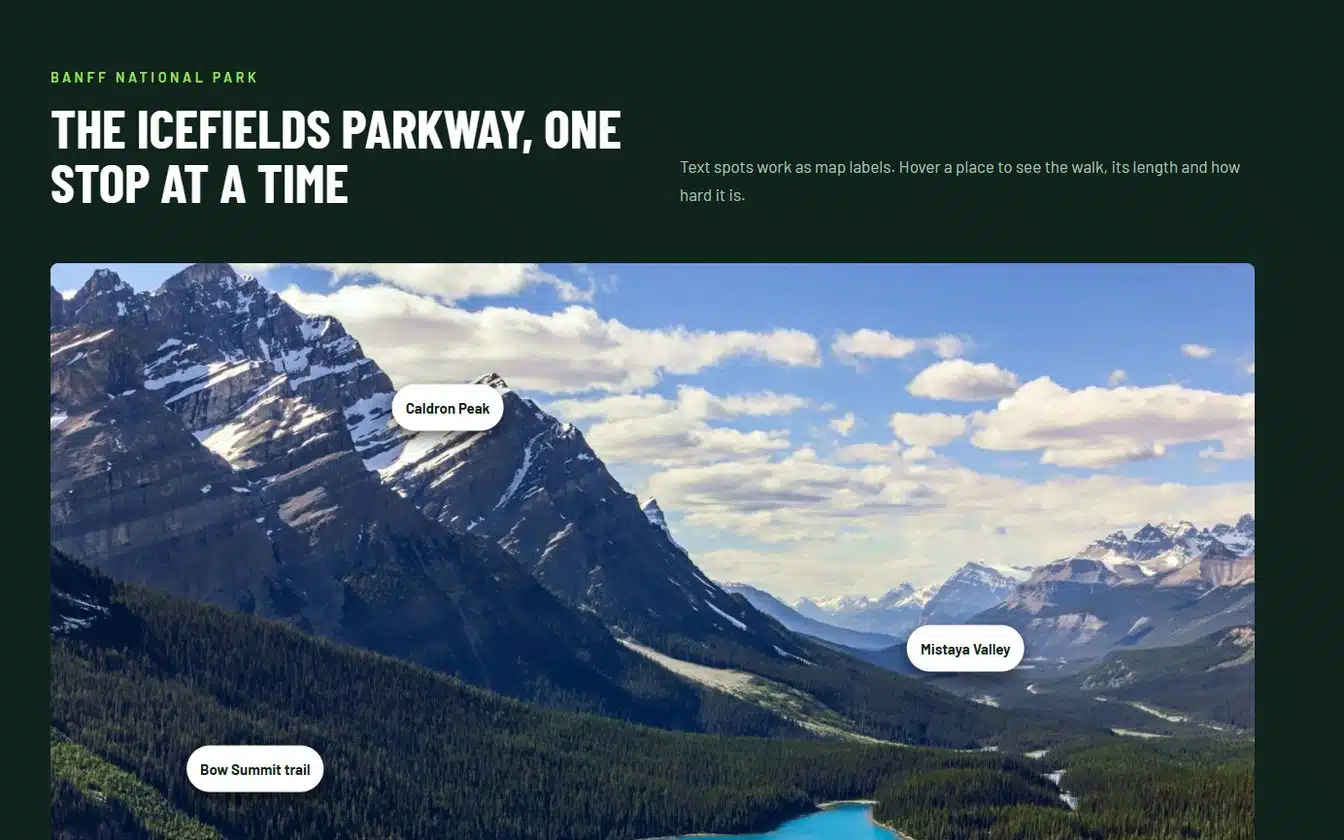
- Maps and tours. Label the stops on a trail map or the areas of an office.
- Product details. Point at the ingredients in a dish or the features of a device.
- Floor plans. Explain each room without filling the page with text.
Tips for hotspots that get used
- Turn on a pulse animation. Visitors need to see that the spots are there.
- Keep tooltips short. A title and one or two lines are enough.
- Use click for links. If a tooltip has a button, set the trigger to click and turn on Interactive.
- Set a smaller spot size for phones. Markers should not cover the photo on a small screen.
- Do not crowd the image. Three to six spots are easier to explore than twenty.
Hover and tap six real examples: a furniture store, a trail map, a fashion look, a skincare product, an office tour and a restaurant dish.
Frequently asked questions
How do I add hotspots to an image in Divi?
Add the DG Image Hotspot module, upload your photo, add a Hotspot Item for each spot, set its left and top position in percent and write the tooltip text.
Can the tooltips open on click instead of hover?
Yes. Set the trigger to hover, click or both. Click works well on touch screens and for tooltips with links.
Can I put a button or a link in a tooltip?
Yes. Add a link in the tooltip text, or show a Divi Library layout with buttons. Turn on Interactive so the tooltip stays open while visitors move into it.
Do the spots stay in place on phones?
Yes. Each spot is placed as a percentage of the image width and height, so it stays on the same object as the photo scales.
Does Image Hotspot work in Divi 4?
Yes. The module is available in both Divi 5 and Divi 4.
See the Image Hotspot module, read the DiviGrid documentation or compare the plans.







0 Comments